Way Beyond Out-of-the-Box: Layout Builder-friendly Theme Options for Authors
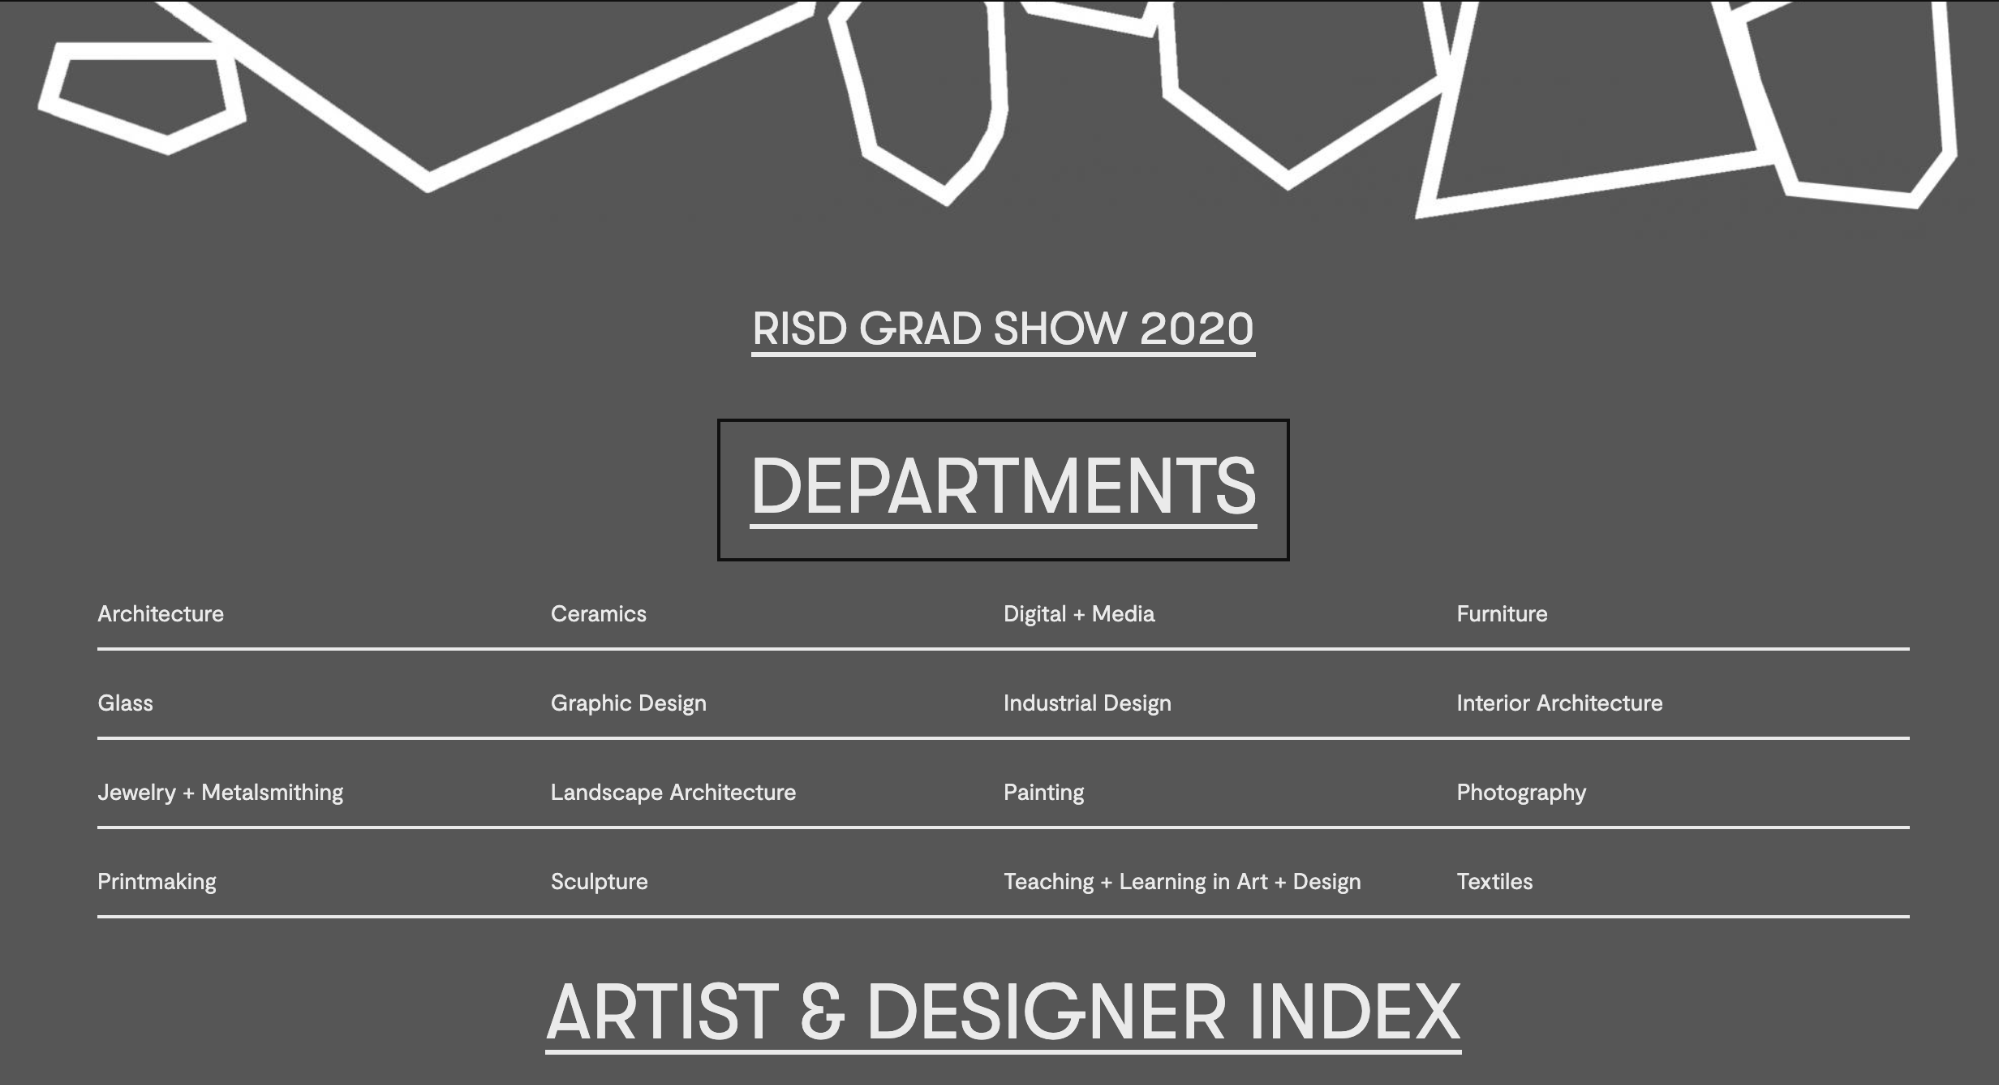
Each spring, students at the Rhode Island School of Design (RISD) exhibit their undergraduate and master’s thesis projects at the RISD Museum. Due to Covid-19, they were unable to prepare and stage physical exhibits in the spring of 2020.
Not to be deterred, the school and museum agreed to host the student work online as fully digital exhibits. The Museum previously partnered with Oomph to build out the award-winning “Raid the Icebox” online publication using Drupal and Layout Builder, so it felt familiar and natural to build out similar features for university student projects.
The necessary work involved extending the existing online gallery features to hundreds of additional artists, so we needed to build a system that could scale. Along the way, while we were at it, we were tasked with adding additional features to the platform. Why not have lofty goals?
The Timeline
We kicked off the first stage of the project on April 20, 2020, aiming for a two-staged release. Most of the new code would need to be deployed by the last week of May, with the additional features released two weeks later. The basic infrastructure would have to be established along with the custom permissions for artists, editors, and museum administrators. A second stage would add refinement to font selection and color palette.
What the Artists Needed
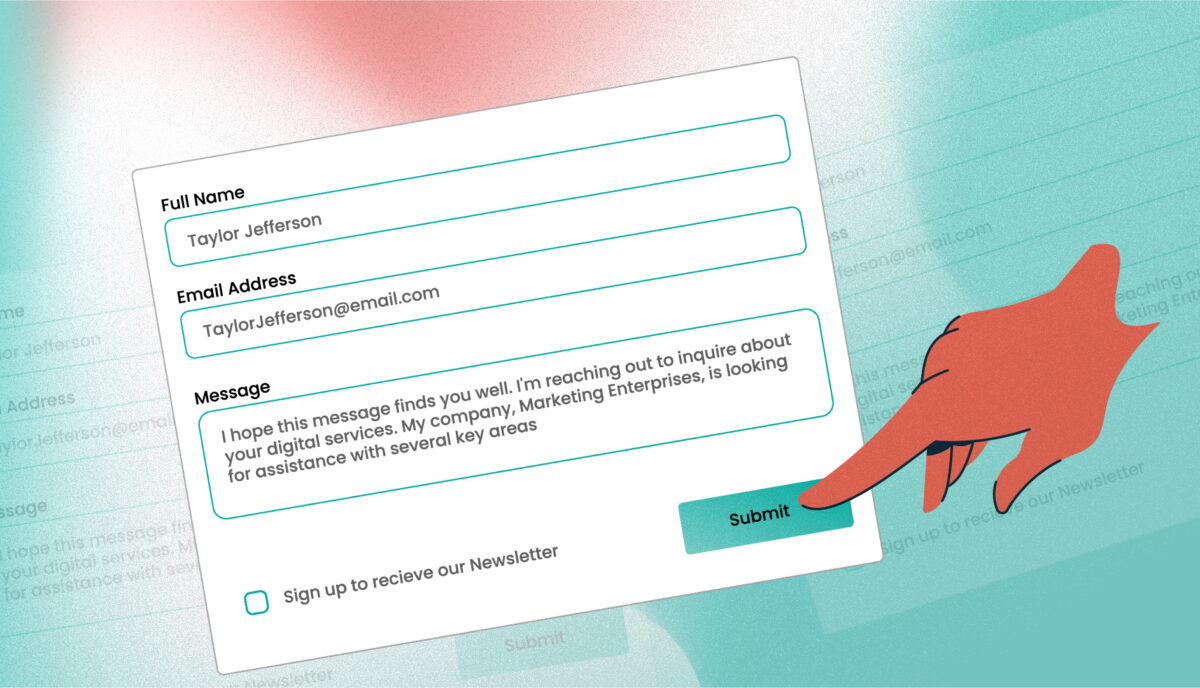
- A platform for routine editor tasks such as editing content, uploading media, altering the layout, and resources to perform many tasks outside the usual scope of content editors.
- The ability to add primary, secondary, and system webfonts to custom content types as well as their associated layout builder templates.
- A custom color palette whose colors were chosen by an admin user. This kind of style addition had to be available through Layout Builder for new publication nodes.
- A few trusted student authors also needed the ability to add JavaScript directly1 into page content. This was an intimidating requirement from a security standpoint, but the end results were highly engaging.
What the Staff Needed
- A robust set of permissions to enable multiple departments to have ownership and administrative controls over their particular domains, including:
- Bulk upload of new users in anticipation of needing to add hundreds of students.
- Node clone functionality (the ability to duplicate pages) to speed up time creating new pieces of content.
- Custom permissions for trusted editors for all content in a particular section.
- Enabling those editors to grant artists permission to view, edit, and access Layout Builder for a particular node.
A Deeper Dive
Overall Approach
We leveraged Drupal to build out our new features “the Drupal way.” The Node Clone and Bulk User Import modules could be installed and enabled with our Composer workflow and used right out of the box to offer additional powerful functionality. Now a user with the Editor role could craft a meticulously designed template and then clone it for other school departments. A user with the Web Administrator role would not have to add users one-by-one through the user interface but could import large numbers of new users — while specifying the user role — with CSV files.
We added the new custom fields, content types, user roles, and text formats manually through Drupal’s UI. We could later use preprocess functions in the theme and Twig templates to render content as needed.
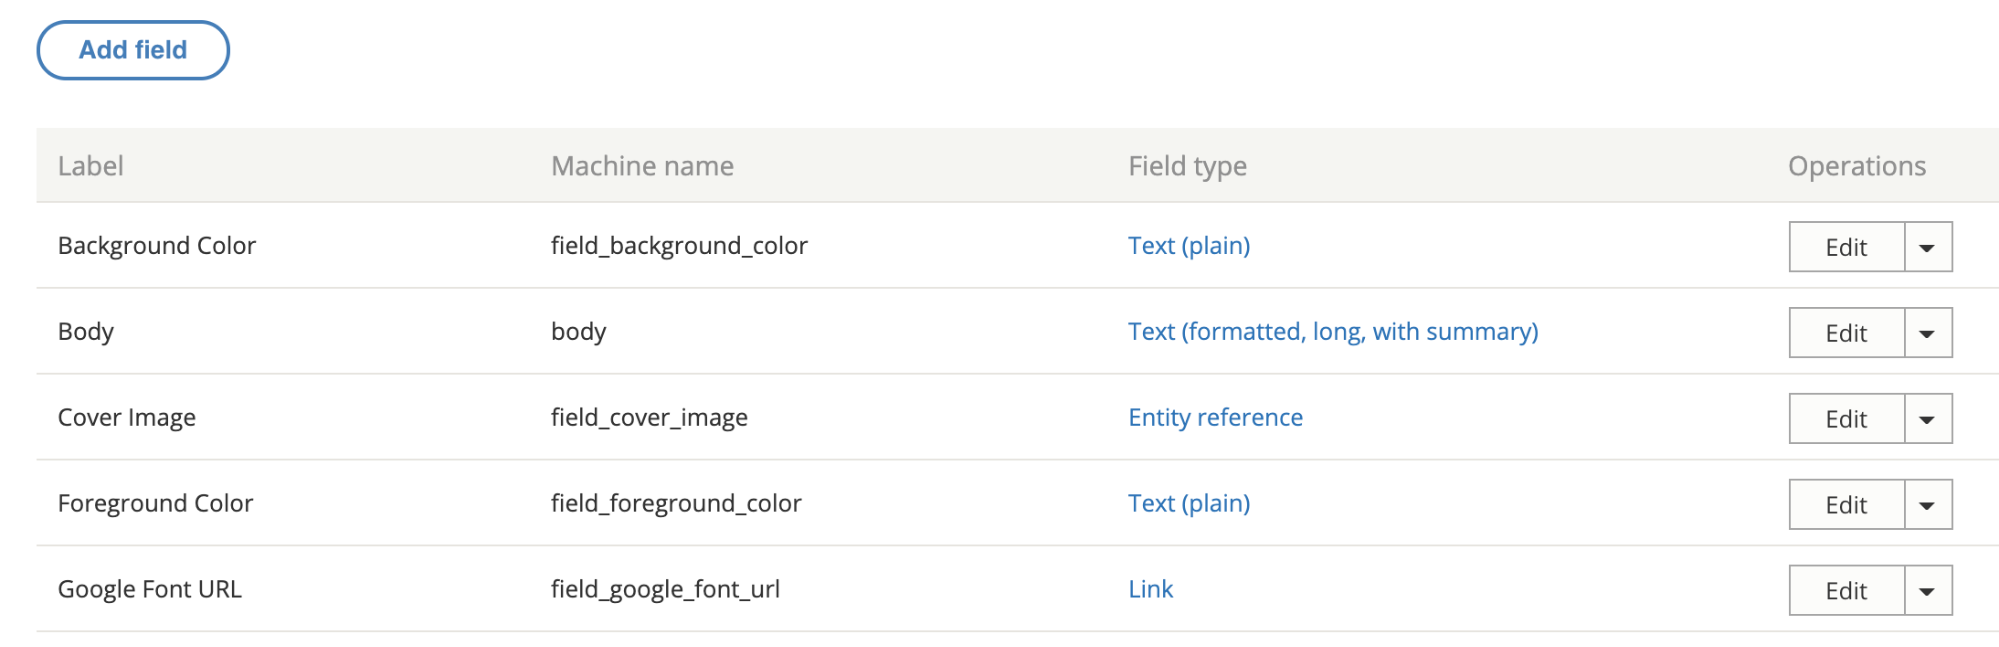
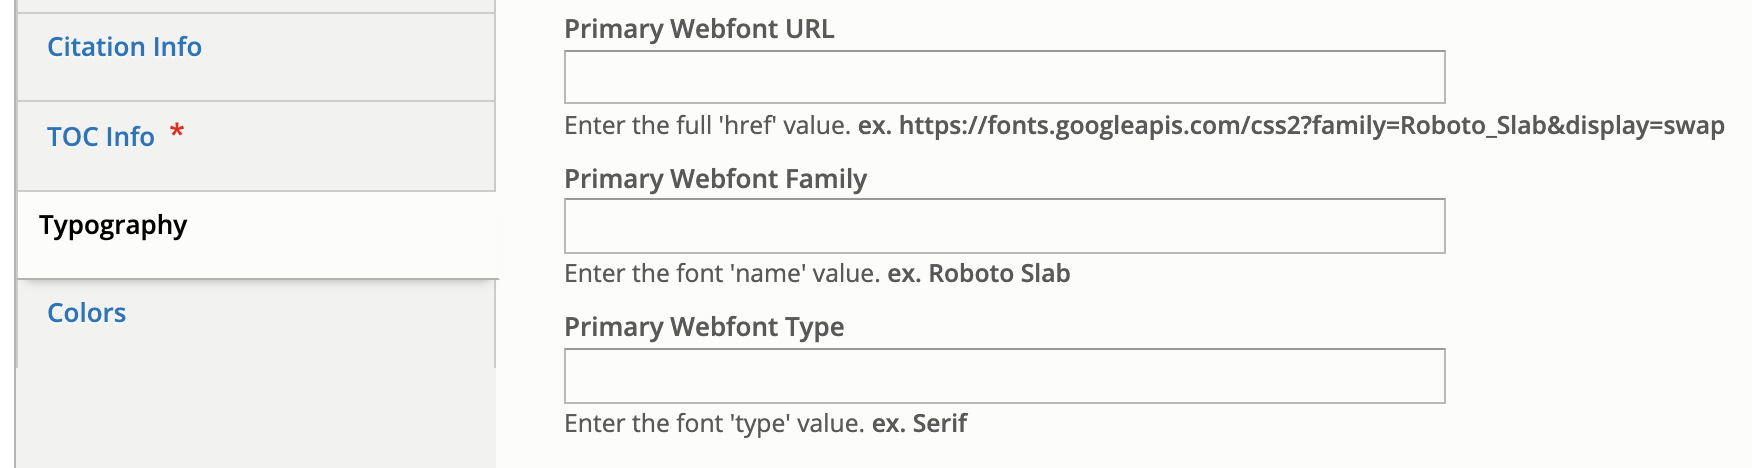
There were a lot of fields needed, covering different aspects of the typography. Here are a few:RISD
Since it was a Drupal 8 project, we made extensive use of config sync to export and import config files. The front-end and back-end developers could work independently until it was time to merge branches for testing. Then we were able to seamlessly push changes to higher environments as part of our deploy process.
Note: As a rule, we recommend setting config to read-only, especially on projects that have many web admin users.
Custom Webfont Example
With those new fields in place, a user sees text input fields on the node edit view of each publication to enter in custom font URLs or names.
In terms of rendering to the page when someone is viewing the node, this requires both a preprocess hook in the [custom_theme].theme file and changes to the Twig template.
Note: Please be aware that allowing hundreds of users to input free text is not an ideal situation, and that security measures should be taken when processing free text.
Here is what the preprocess hook looks like for the mytheme.theme file:
use Drupal\node\Entity\Node;
use Drupal\taxonomy\TermStorage;

/**
 * Implements hook_preprocess_HOOK().
 */
function mytheme_preprocess_html(array &$variables) {
  $routeMatch = Drupal::routeMatch();
  $node = $routeMatch->getParameter('node');

  if ($node instanceof Node && $node->getType() === 'publication’) {

    if (isset($node->field_primary_webfont_url) && !$node->field_primary_webfont_url->isEmpty()) {
      $variables['primary_webfont_url'] = $node->field_primary_webfont_url->value;
      $variables['primary_webfont_family'] = $node->field_primary_webfont_family->value;
      $variables['primary_webfont_type'] = $node->field_primary_webfont_type->value;
    }
PHP
Then in the Twig template, which is at this path: myproject/docroot/themes/custom/mytheme/templates/layout/html.html.twig
<!DOCTYPE html>
<html{{ html_attributes }}>
  <head>
    <title>{{ head_title }}</title>

    {% if primary_webfont_url|length %}
      <link rel="stylesheet prefetch" media="screen" href="{{ primary_webfont_url }}">
      <style type="text/css">
        :root {
          --ff__serif: '{{ primary_webfont_family }}', {{ primary_webfont_type }};
        }
      </style>
    {% endif %}

    {% if secondary_webfont_url|length %}
      <link rel="stylesheet prefetch" media="screen" href="{{ secondary_webfont_url }}">
      <style type="text/css">
        :root {
          --ff__sans: '{{ secondary_webfont_family }}', {{ secondary_webfont_type }};
        }
      </style>
    {% endif %}

    {% if background_color_override|length and foreground_color_override|length %}
      <style type="text/css">
        :root {
          --c__primary--bg: {{ background_color_override }};
          --c__primary--fg: {{ foreground_color_override }};
        }
      </style>
    {% endif %}

  </head>
  <body{{ attributes }}>
    {{ page_top }}
    {{ page }}
    {{ page_bottom }}
  </body>
</html>
HTML
Finally, here is what someone viewing a page would see:
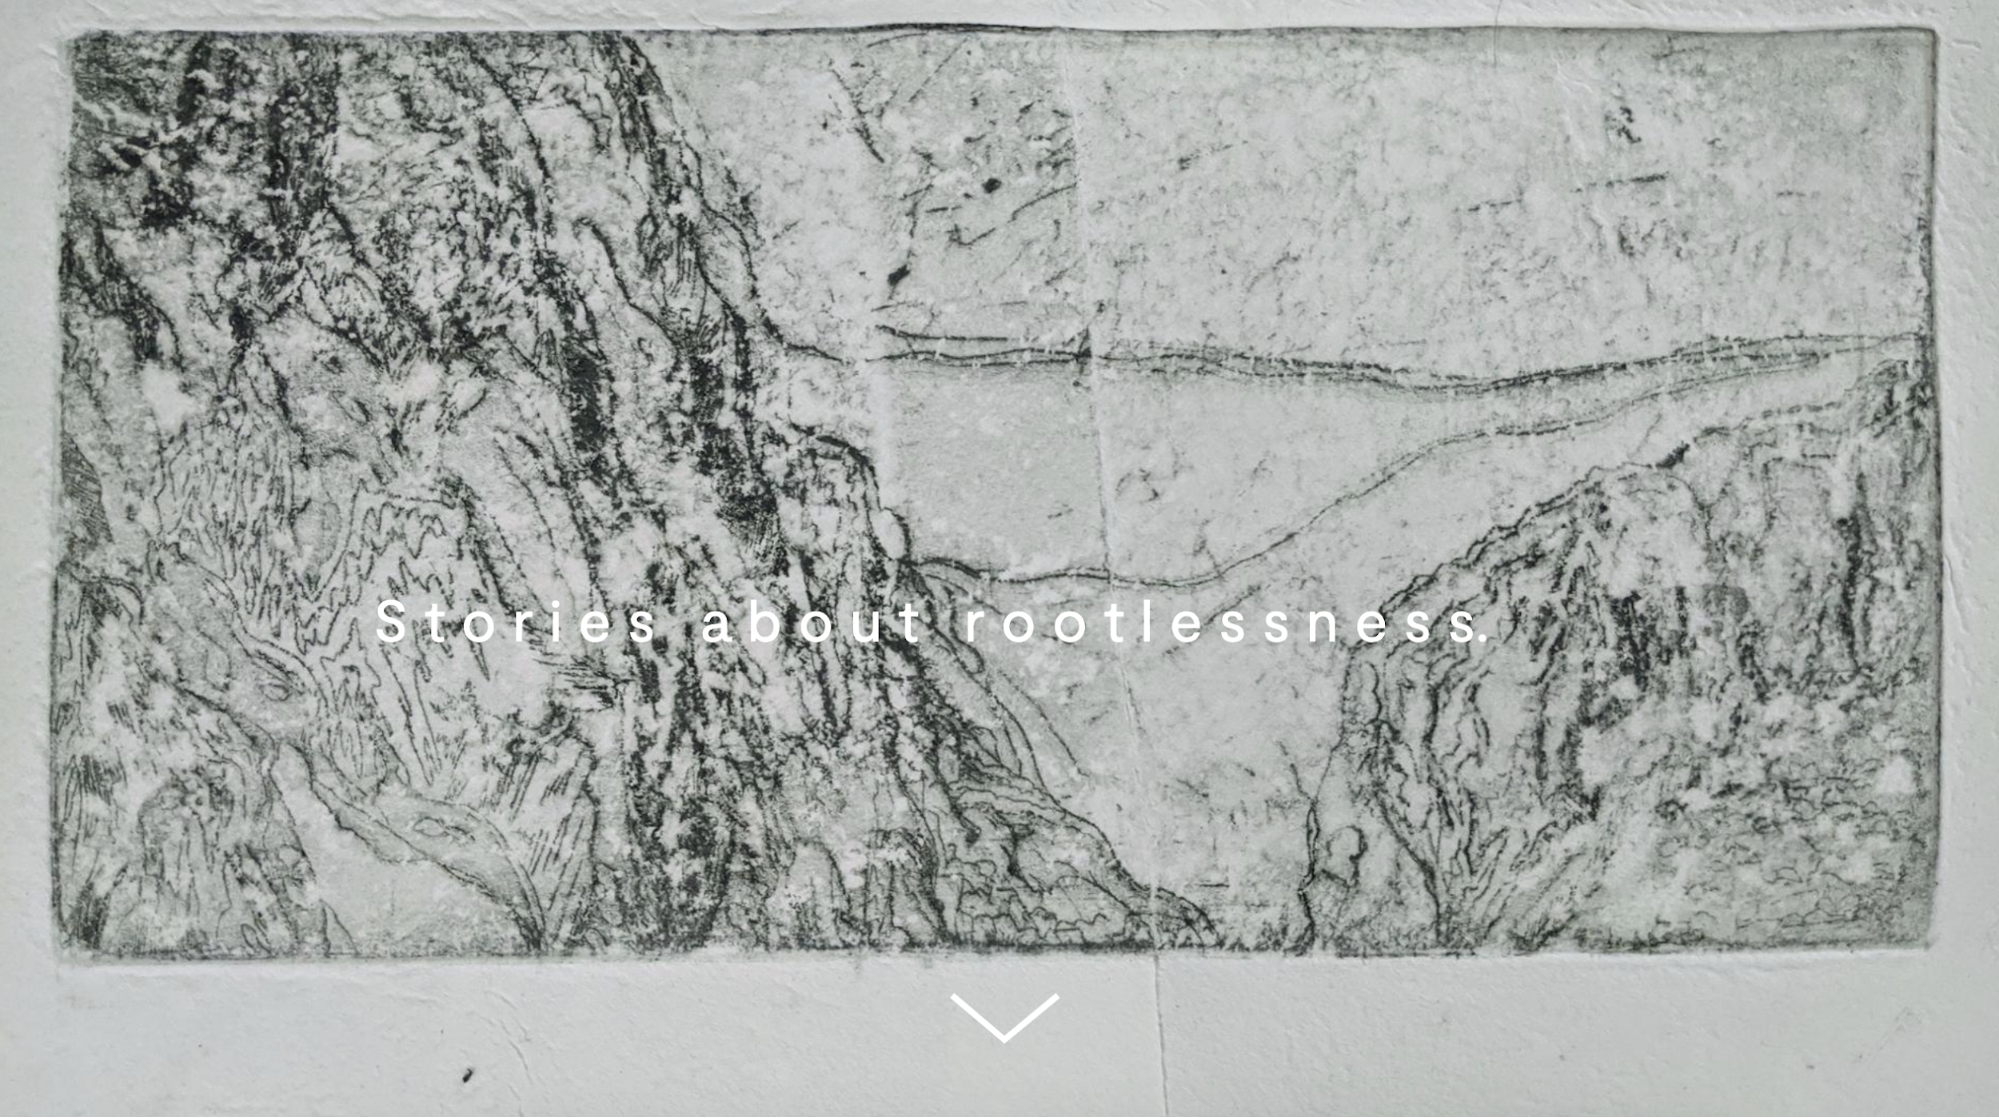
Most of the creative work for each piece of content happened behind the scenes in Layout Builder. Each block or section could be configured individually, which gave the artists a lot of ability to customize their online territories to the fullest extent possible.
In addition to being able to choose a foreground or background color on the node level, an artist or editor can choose to change the color of just one block in Layout Builder simply by clicking on the “Style Settings” link.
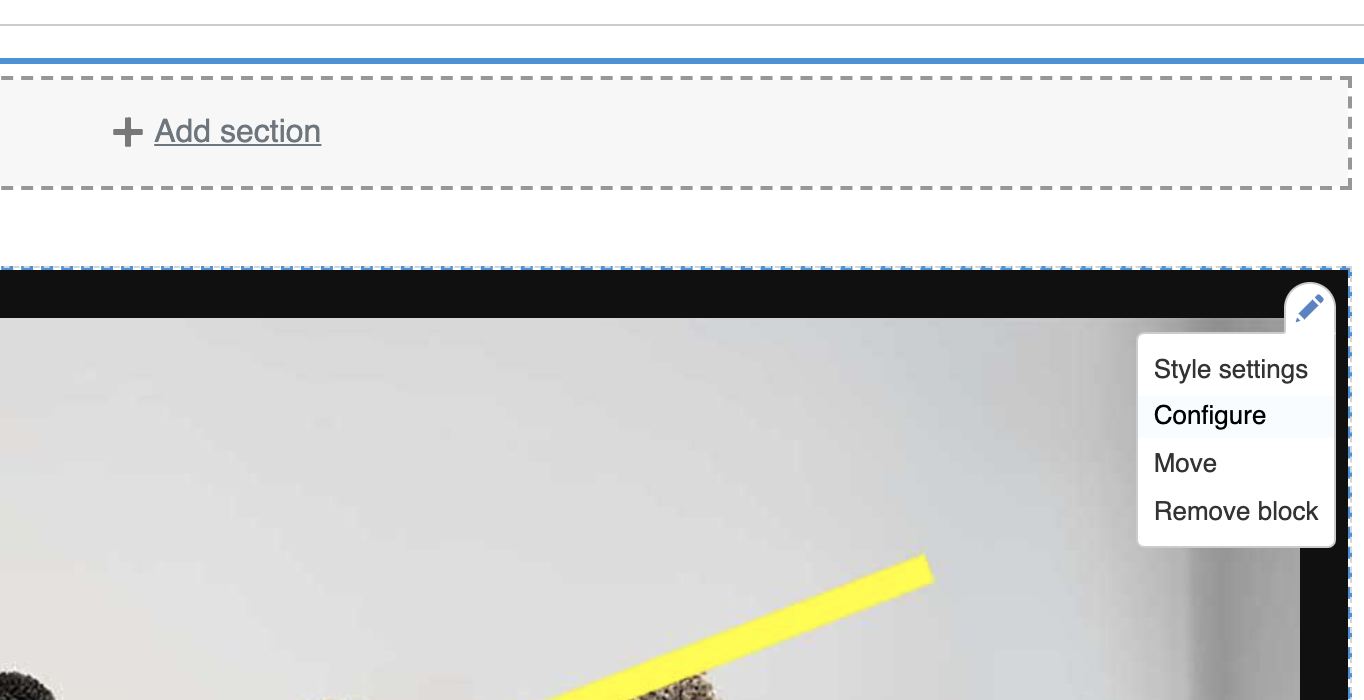
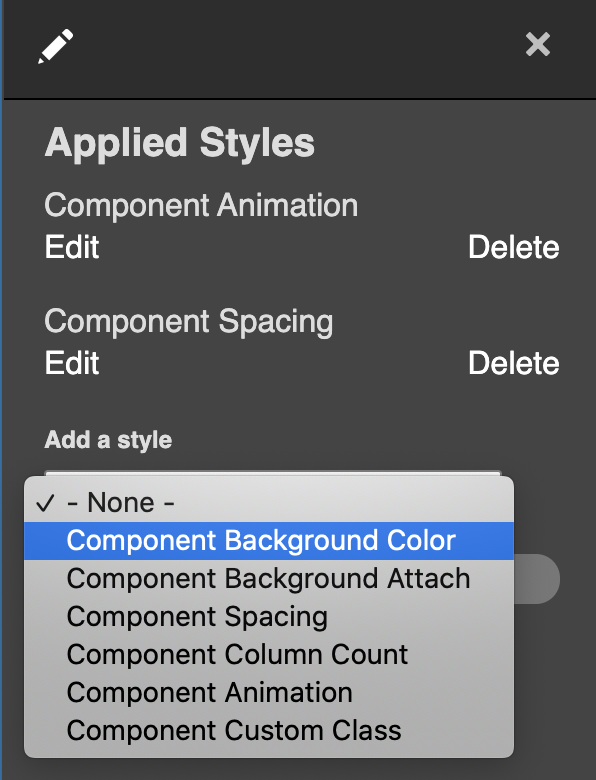
Another inline-editing window will pop up with additional options. In the “Add a style” dropdown menu, the artist or editor can select “Component Background Color,” click “Add Styles,” and choose from one of the colors in the palette to be applied to the block.
Along with the preprocessing described in the previous section, we extended Layout Builder’s features with a custom module to alter layouts. The plugin class lives at: docroot/modules/custom/my_module/Plugin/Layout/LayoutBase.php
<?php

namespace Drupal\my_module\Plugin\Layout;

use Drupal\Core\Form\FormStateInterface;
use Drupal\Core\Layout\LayoutDefault;
use Drupal\Core\Plugin\PluginFormInterface;

/**
 * Provides a layout base for custom layouts.
 */
abstract class LayoutBase extends LayoutDefault implements PluginFormInterface {

  public const NO_BACKGROUND_COLOR = 0;

  public function build(array $regions): array {
    $build = parent::build($regions);
    $backgroundColor = $this->configuration['background_color'];
    if ($backgroundColor) {
      $build['#attributes']['class'][] = 'rpp__bg-color--' . $backgroundColor;
    }
    return $build;
  }

  public function defaultConfiguration(): array {
    return [
      'background_color' => NO_BACKGROUND_COLOR,
      'id' => NULL,
      'background_color_override' => NULL,
    ];
  }

  public function buildConfigurationForm(array $form, FormStateInterface $form_state): array {
    $form['background'] = [
      '#type' => 'details',
      '#title' => $this->t('Background'),
      '#open' => TRUE,
      '#weight' => 20,
    ];
    $form['background']['background_color'] = [
      '#type' => 'radios',
      '#default_value' => $this->configuration['background_color'],
    ];
    $form['background']['overrides'] = [
      '#type' => 'fieldset',
      '#title' => $this->t('Overrides'),
    ];
    $form['background']['overrides']['background_color_override'] = [
      '#type' => 'textfield',
      '#title' => $this->t('Background Color'),
      '#default_value' => $this->configuration['background_color_override'],
      '#attributes' => [
        'placeholder' => '#000000',
      ],
    ];
    return $form;
  }

  public function submitConfigurationForm(array &$form, FormStateInterface $form_state) {
    $values = $form_state->getValues();
    $this->configuration['background_color'] = $values['background']['background_color'];
    $this->configuration['id'] = $values['extra']['attributes']['id'];
    $this->configuration['background_color_override'] = $values['background']['overrides']['background_color_override'];
  }

}
PHP
The Background Color form gets inserted into the Layout Builder form, and the user’s color selections get submitted and saved to configuration in the submitConfigurationForm() method.
The custom layout needs to be registered, so it should be added in a file called: my_module.layouts.yml and looks like:
layout_base:
  label: 'New Layout'
  category: 'Custom Layouts'
  template: templates/layout-base
  default_region: main
  regions:
    main:
      label: Main content
PHP
Now this custom layout with color overrides and whatever else you want to add will be available for users with the appropriate permissions to edit content in Layout Builder.
Conclusion
Jeremy Radtke, Assistant Director of Digital Initiatives at the RISD Museum, said in a recent presentation to the Museum Publishing Digital Interest Group that RISD sees the museum as a site of creative collaboration. In terms of the end-of-year digital showcase, this is demonstrated in the emphasis on student artists having a high degree of creative control over their projects. They were able to radically alter the existing layout templates offered to them, changing fonts, colors, and other elements of the theme. They were able to configure blocks to add static images, animated gifs, and other media files such as short films to stretch the limits of the digital space.
There were a total of 700 undergraduates and grads featured in the online exhibit, which featured 16 departments. The art school is attached to the RISD Museum, and Radtke said the museum’s style is very much along the lines of an art school, in that it employs critique — asking questions and solving problems is strongly emphasized. This project was about content delivery, but also how to generate content. Oomph was proud to be part of that collective journey of exploration and experimentation.
Related Resources
- Oomph case study about Ziggurat and “RAID the Icebox”
- Museum Publishing Digital Interest Group presentation on RISD Museum online exhibits