Adding Google as an Identity Provider with Okta’s SSO
Maintaining logins for numerous platforms can become a headache over time. This is especially the case for an organization where members join and leave often. On- and off-boarding can become a hassle to manage.
For one of our clients, we needed a better way to control application privileges. If a new team member was starting, our team would manually create new accounts. Then if someone left their company or ours, we would manually remove their account from the infrastructure. This was not only an extra set of tasks which require time to accomplish, but also a potential point of failure where forgetting to remove a former team member’s access.
Single-sign-on to the Rescue
Single-sign-on (SSO) is something that almost all internet users have encountered, whether or not they know it. Logging in to Instagram with your Facebook account, or signing in to any number of Android apps with your Google account are some easy examples.
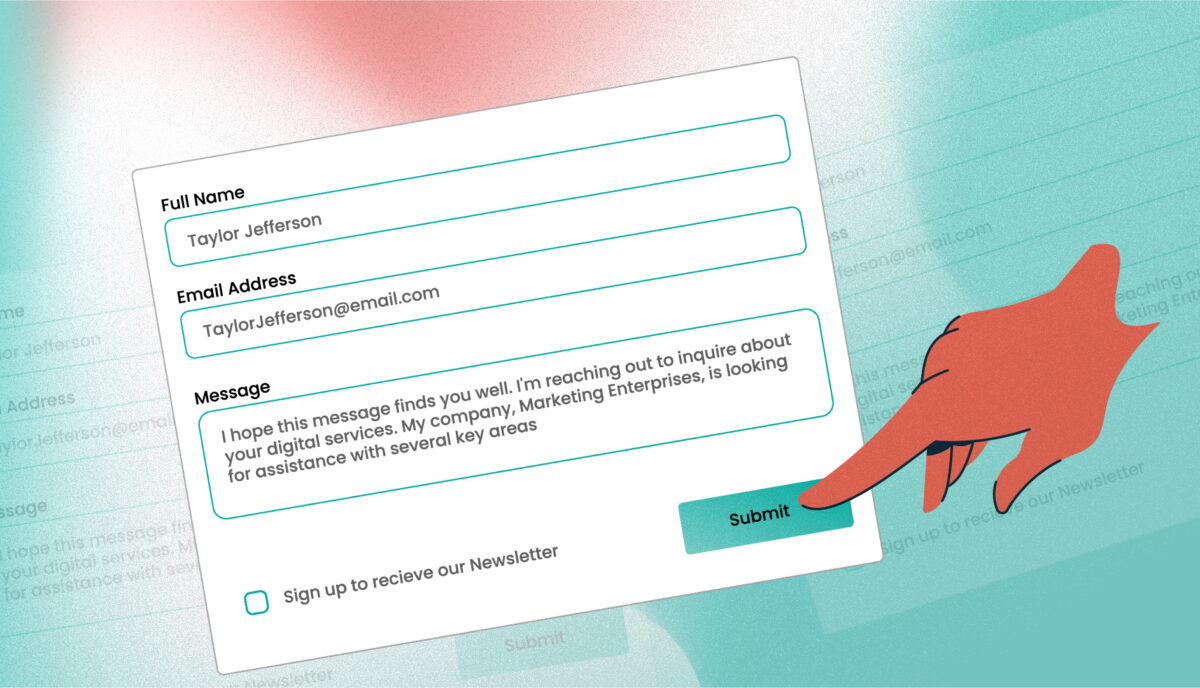
To the user, this is much easier than creating a new account and filling in yet another registration form — and keeping track of one more password. In these cases, your identity is maintained by one entity (Facebook or Google) and used to populate your account information on a service provider (Instagram or Android).
SSO as a De-provisioning Tool
In a business environment, the relationship between the Identity Provider (IdP) and Service Provider (SP) has a very useful feature — if the account is removed on the IdP’s side, that user will no longer be able to access the SP application. This makes de-provisioning users a single-step process.
At Oomph, we use Google’s G Suite for email, calendars, and their productivity Apps. If we could use our Google accounts to sign in to, say, Evernote, why couldn’t we also use our Google identity to control access to our client projects?
Getting Google and Okta to Shake Hands
Our client in this example had been using <a href=”//www.okta.com”target=”_blank” rel=”noopener noreferrer” title=”Opens in a new window”>Okta as their SSO provider. In our experience, they have been pretty great to work with. Through Okta, we can control access to various entities — from logins for end users on the web application, to client access to their CMS, to access control for the GitHub organization where the code repository is hosted.

Up until this point however, we had always created accounts and signed in to Okta manually — like cave people. There had to be a better way. By using Google as our own Identity Provider to manage access to Okta, and through that, our client’s environments, we could have a single source of truth and much easier provisioning/deprovisioning.
Less than Stellar Documentation
The internet and Google have amazingly detailed and accurate tutorials for a lot of things, but not everything. As is the case sometimes, the documentation on these matters was thin or confusing or just plain wrong. At points we found that we started reading about how to set Google as an IdP, only to later realize that the documents appeared to discuss the reverse relationship — using Okta as an IdP for Google Apps.
After some trial and error, we were able to get a successful handshake between the two. We may have created the digital equivalent of Scrödinger’s cat in the process, but that’s a story for another time. Here is how we did it.
How to Set up Google as an IdP with Okta SSO
Okta does have a Google-specific Identity Provider type, however, it led us down a path where we ended up with an Identity Provider which both existed and didn’t exist at the same time (the aforementioned Scrödinger’s cat). As such, we found the easiest method was to use a standard SAML 2.0 Identity Provider. These exact steps are for setting up a connection to Okta — these basic principles should also apply to any SSO service provider which can use SAML 2.0. With that background, let’s get started:
In Okta, navigate to the admin panel, and from here, select Identity Providers under the Security tab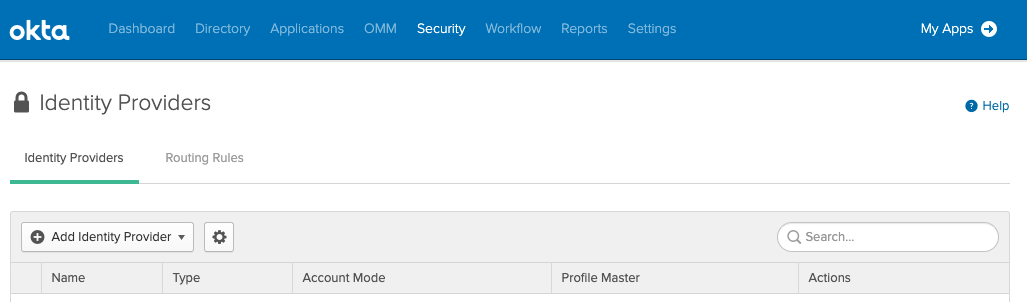
Press “Add Identity Provider” and then “Add SAML 2.0 IdP” from the dropdown
Here you will have a number of options to configure, and many will depend on your own setup. Some important ones are:
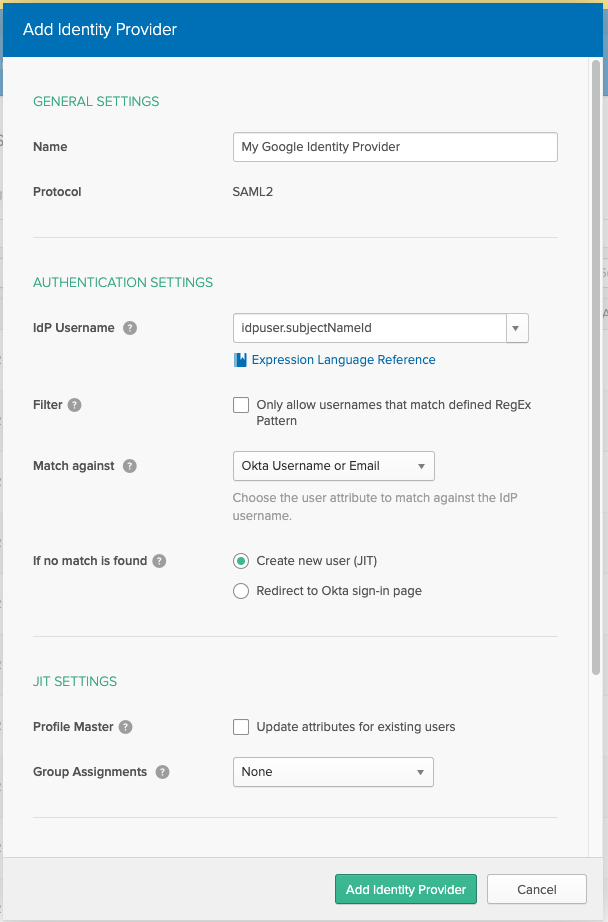
- Name: give your Identity Provider an appropriate name
- IdP Username: typically idpuser.subjectNameId will suit your needs
- An extra hurdle we encountered for our own use case was the fact that at Oomph, some years ago we migrated to a new domain — while we typically use “oomphinc.com” these days, all of our previous accounts were set up with a legacy email root in place. Google still sees our legacy domain as the primary, and as such, would attempt to provision new (incorrect) users for us. Many fields in Okta allow the use of their expression engine. Leveraging this, we were able to set our IdP Username field as follows:
String.replace(idpuser.subjectNameId, "legacy", "preferred")meaning that while Google is sending “jdoe@legacy.com”, the Okta account will be created as “jdoe@preferred.com”
- An extra hurdle we encountered for our own use case was the fact that at Oomph, some years ago we migrated to a new domain — while we typically use “oomphinc.com” these days, all of our previous accounts were set up with a legacy email root in place. Google still sees our legacy domain as the primary, and as such, would attempt to provision new (incorrect) users for us. Many fields in Okta allow the use of their expression engine. Leveraging this, we were able to set our IdP Username field as follows:
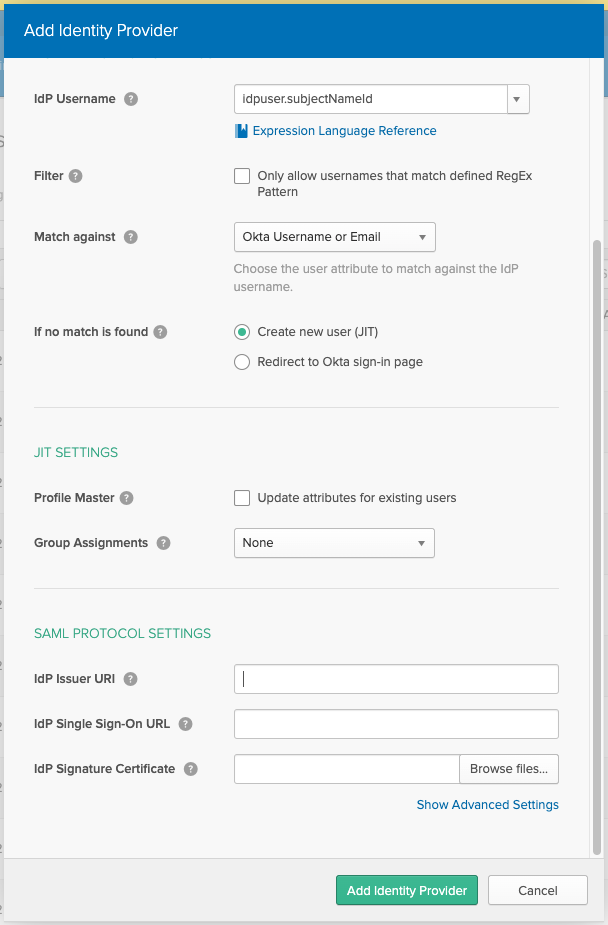
- Match against: Okta Username or email
- Profile Master: This will depend on the use case. It refers back to the idea that if a user’s information is changed in Google, their Okta profile will be updated to match. If left unchecked, the user may update their information in Okta without it being overwritten on their next login
- Group assignments: Whether to assign the user to Okta groups — either a static group (or groups) for all users. With the option “Full sync of groups” and an attribute name as well as a list of groups in the Group Filter, an attribute can be sent by the IdP containing the name of the group a user should be assigned to if it is in the Group Filter list.
For now, leave the Okta IdP configuration screen open, and it is time to hop over to your Google admin.google.com
Navigate to Apps -> SAML Apps
Add a new app with the “+” in the bottom right corner of the screen
In the modal, select “Setup my own custom app” at the bottom of the pop up
Copy SSO URL, Entity ID and download the certificate
Return to the Okta setup page, and enter the values from G Suite for the IdP Single Sign-On URL (SSO URL), IdP Issuer URI (Entity ID), and upload the certificate downloaded from Google
Press “Add Identity Provider” in Okta
On the Identity Provider screen in Okta, expand the new Identity Provider, and copy the Assertion Consumer Service URL and Audience URI values

Return to Google, enter a name for your application, and optionally add a description and logo, then navigate to the next step
On this step, enter the ACS URL (Assertion Consumer Service URL from Okta) and Entity ID (Audience URI from Okta)
Leave the Start URL blank
Check the Signed Response box
Leave the Name ID values as defaults
Set Name ID Format to “EMAIL”
Press “Next” to move on to attribute mapping. This will depend entirely on your own needs. The left column will be the field names expected by your Okta configuration. This is the profile data which will be sent from Google to Okta when creating or updating the user account in Okta
At this point you should have the basics configured to connect to Okta with Google as an Identity Provider. Press “Finish” to save the configuration in Google. From here you can grant access to users in your Google organization. Your app should now appear at gsuite.google.com/dashboard and selecting your new application should bring you to Okta and sign you in automatically, granting access to any Okta managed applications.
Good Luck with your Configuration
The convenience of the connection between Google and Okta for our organization and our client’s can’t be denied. We are so glad to have this set up. But it took some doing, particularly when the documentation we were able to find was incomplete. We hope this info can help your organization get these two talking to each other.
Can your organization benefit from a fine-tuned SSO or SAML connection? Drop us a line with questions or requests.